Author: ffwd_vic_home_improvement

  • Maximize Space with Creative Cabinet Solutions

    Maximize Space with Creative Cabinet Solutions

    Closet Cabinets Contractor. Finishing Wooden Wardrobe by Professional Installer.

    In the quest for a clutter-free and organized home, storage is king. Yet, the challenge intensifies in compact living environments where every inch counts. Here, cabinets emerge as the unsung heroes of space management. 


    Far from mere boxes with doors, today’s cabinets are innovative, adaptable, and aesthetically pleasing. They not only provide a home for your belongings but also enhance the look and feel of your space. Whether in a cozy studio apartment or a spacious family home, the right cabinet design can revolutionize your living experience. 

    From hidden compartments to stylish displays, cabinets offer possibilities for those willing to think outside the box.

    The Magic of Modular Cabinets

    Modular cabinets are the chameleons of the furniture world, adeptly adapting to various spaces and needs. Their unique design allows them to fit into any room, regardless of size or shape. Here’s why they’re a game-changer:


    • Flexibility: Unlike traditional cabinets, modular units can be reconfigured, expanded, or reduced to suit changing lifestyles and spaces. This adaptability makes them a long-term investment for your home.
    • Customization: With a range of sizes, colors, and finishes available, modular cabinets allow you to create a storage solution that reflects your style and meets your specific needs.
    • Space Optimization: These cabinets utilize space efficiently. They make the most of every inch, from floor-to-ceiling designs to under-stair storage solutions.


    Modular cabinets not only offer practical storage solutions but also contribute to the aesthetic appeal of your home. They are the perfect blend of function and style, making them a top choice for those seeking creative ways to declutter and organize their living spaces.

    Smart Cabinet Designs for Every Room

    Cabinets are the keystones of a well-organized and stylish home. Each room presents unique storage challenges and opportunities. The right cabinet design can solve these challenges and enhance the room’s aesthetic appeal. 

    Let’s explore how innovative cabinet solutions can transform these everyday spaces into models of functionality and style.
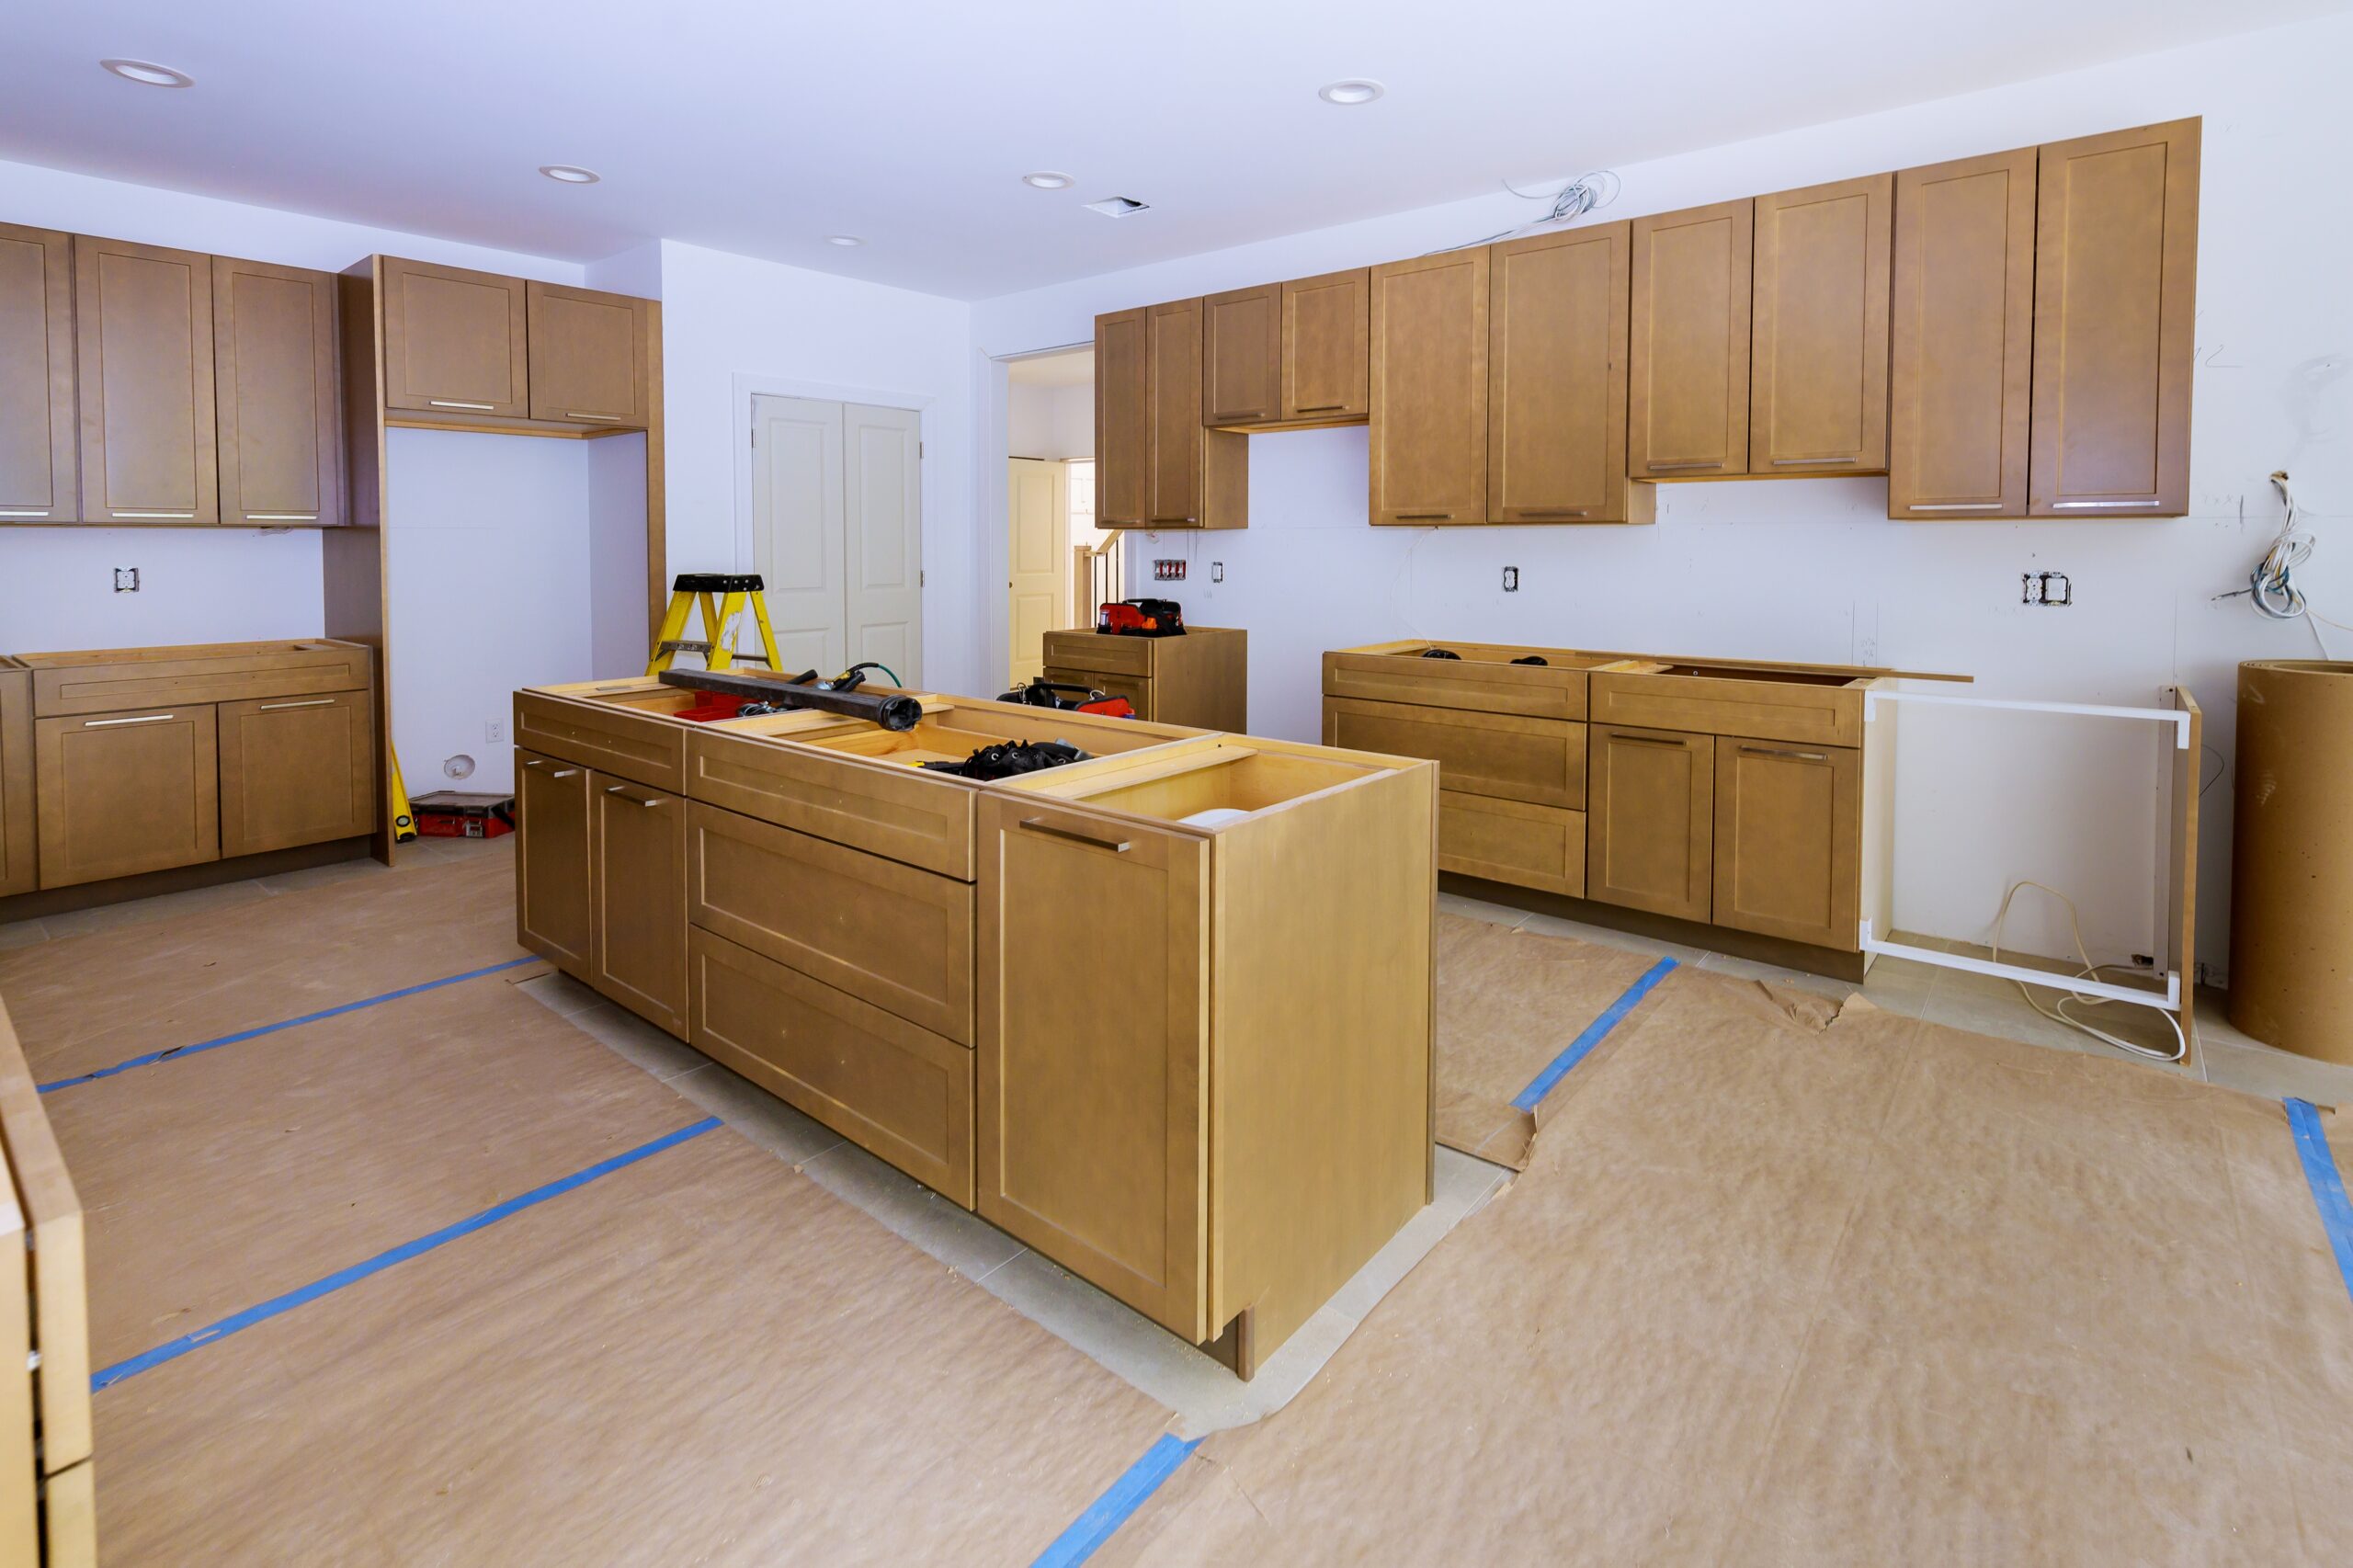
    Kitchen

    • Corner Cabinets: Transform those awkward kitchen corners into storage havens with carousel-style or pull-out corner cabinets. These innovative designs make accessing pots, pans, and other kitchen essentials effortless.
    • Pull-Out Drawers: Incorporate pull-out drawers under countertops for an organized and reachable storage system. Ideal for spices, cutlery, and small appliances, they keep your counters clutter-free.

    Bedroom

    • Under-Bed Cabinets: Utilize the often-overlooked space under your bed. Under-bed cabinets or drawers store seasonal clothing, extra bedding, or books.
    • Over-the-Headboard Storage: Make the most of the space above and around your bedstead’s headboard. Cabinets or shelving units here can serve as a stylish and functional addition, ideal for books, decor, or nighttime essentials.

    Living Room

    • Custom-Built Entertainment Units: Tailor-made entertainment units can house your TV, gadgets, and media collections while complementing your living room’s décor.
    • Floating Cabinets: These wall-mounted units are not just space savers but add a modern touch to your living space. It is ideal for storing books, showcasing decor, or organizing multimedia items.


    Embracing these cabinet designs can create a more organized and functional living space. You will also have a home that resonates with personal style and comfort, making every room a testament to thoughtful design and efficient living.

    Transforming Small Spaces with Cabinets

    Small spaces can be transformed dramatically with clever cabinet solutions. By focusing on vertical space and multi-functionality, cabinets can make a room feel more extensive and more organized.


    • Vertical Expansion: Tall, slim cabinets draw the eye upwards, making ceilings appear higher. Use these in corners or alongside existing furniture to maximize vertical space without overwhelming the room.
    • Mirrored Cabinet Doors: Incorporate mirrors on door cabinets to reflect light and create an illusion of depth. This trick works wonders in making small rooms appear more spacious.
    • Hidden Storage Features: Cabinets with fold-out or pull-down features provide extra surface area when needed and tuck away neatly. It is ideal for dining areas or home offices in compact spaces.

    Multi-Functional Marvels


    • Room Dividers with Storage: Use freestanding cabinets as room dividers that offer storage while sectioning off areas in an open-plan space.
    • Fold-Out Desks or Tables: Cabinets that transform into desks or dining tables offer a flexible solution for work or meals, especially in studio apartments.


    Cabinets are not just storage options but a means to reinvent and maximize every square inch. These solutions prove that with some creativity and strategic planning, limited space doesn’t have to limit your lifestyle or your home’s potential. It’s all about finding the right balance between functionality and design to make your space work for you in the best way possible.

    The Art of Cabinet Organization

    Organizing your cabinets is not just about storing items; it’s about creating a system that makes your life easier. Here’s how to achieve this:


    • Categorize Your Items: Start by grouping items by their use. Keep frequently used items within easy reach and occasional items on higher shelves.
    • Use Dividers and Baskets: Implement dividers for drawers and baskets in cabinets. It helps in segregating items and maintaining order.
    • Label Everything: Label shelves, baskets, and containers. This simple step saves time and avoids confusion, especially in shared spaces.
    • Regular Decluttering: Make it a habit to review and declutter your cabinet contents periodically. That ensures that you’re only storing what you need and use.


    An organized cabinet system saves time and reduces stress, making your daily routine more efficient and pleasant.

    DIY Cabinet Solutions for the Creative Mind

    Embracing a DIY approach to cabinet solutions can be a rewarding experience. It allows you to tailor storage to your needs and adds a personal touch to your space. Here are some ideas to inspire your next project:


    • Customize Your Cabinet Designs: With essential woodworking tools, you can create custom cabinets that fit your specific dimensions and style preferences. Online tutorials and woodworking plans can be great resources.
    • Repurpose and Upcycle: Transform old furniture pieces into unique storage solutions. An old dresser can become a kitchen cabinet with some paint and new hardware.
    • Add Personal Touches: Customize store-bought cabinets by adding creative knobs, decorative panels, or a fresh coat of paint. It can dramatically change their look and feel.
    • Shelving Solutions: Consider building open shelves if complete cabinet construction seems daunting. They are more straightforward to make and can be equally effective for storage and display.

    DIY cabinet-making enhances your living space and provides a sense of accomplishment. Plus, it’s an opportunity to express your creativity and individuality.

    Maximizing Aesthetics Alongside Functionality (150 words)

    The true beauty of cabinet design lies in its ability to merge aesthetics with practicality. A well-chosen cabinet serves its functional purpose and complements and enhances the room’s overall décor.


    • Harmonizing with Home Decor: Select cabinets that echo your home’s style and color palette. The right design can elevate the room’s ambiance, whether sleek and modern or rustic and vintage.
    • Material Matters: The choice of material can significantly impact your cabinets’ look and longevity. Options range from classic wood to contemporary metal and glass, each adding a different character to the room.
    • Color Coordination: Choosing the right color can transform the visual appeal of your cabinets. Neutral tones offer versatility, while bold colors can become statement pieces in the room.


    These elements ensure your cabinets are integral to your home’s aesthetic appeal.


    Unlocking Your Space’s Potential

    As we’ve explored, the right cabinet solutions can profoundly impact your home’s functionality and aesthetic. Modular designs offer unparalleled flexibility, while innovative organization turns chaos into harmony. Tailoring storage to every room ensures every inch is used wisely, and DIY projects invite a personal touch into your space. The marriage of functionality and beauty in cabinet design serves practical needs and reflects your unique style.


    Remember, cabinets are more than just storage units; they are the building blocks of a well-organized, stylish home. Thoughtfully organizing them unlocks the full potential of your living spaces. Embrace these creative storage solutions and watch your home transform into a haven of efficiency and beauty.


    Visit our VIC HOME IMPROVEMENTS LLC blog for more home remodeling ideas and professional services from our team tailored to your needs.

  • Custom vs. Stock Cabinets: Which is Best for Your Kitchen?

    Custom vs. Stock Cabinets: Which is Best for Your Kitchen?

    Choosing cabinets is a critical decision in any kitchen renovation, influencing both functionality and aesthetics. When it comes to cabinets, two primary options stand out: custom and stock cabinets. In this blog post, we’ll delve into the characteristics of custom and stock cabinets, helping you make an informed decision on which is best for your kitchen based on your preferences, budget, and requirements.

    1. Custom Cabinets: Tailored to Perfection

    Personalized Design

    One of the significant advantages of custom cabinets is the ability to tailor the design to your specific needs and preferences. From materials and finishes to dimensions and storage solutions, every detail can be customized.

    Optimal Use of Space

    Custom cabinets allow you to maximize every inch of available space in your kitchen. This is particularly beneficial if you have unique architectural features or unconventional layouts that require a specialized approach. With custom cabinets, you have the freedom to choose high-quality materials, ensuring durability and longevity. This option often provides access to a wider range of wood species, finishes, and hardware.

    Considerations

    The personalized nature of custom cabinets comes with a higher price tag. If budget constraints are a primary concern, custom cabinets might stretch your financial limits. Custom cabinets require more time for design, fabrication, and installation. If you’re working within a tight schedule, this longer lead time might be a consideration.

    2. Stock Cabinets: Convenience and Affordability

    Advantages

    Stock cabinets are generally more budget-friendly than custom options. They offer a cost-effective solution for homeowners who want a kitchen upgrade without breaking the bank. Stock cabinets are readily available, making them an excellent choice if you’re on a tight timeline. This quick availability can expedite the overall kitchen renovation process.

    Variety of Styles

    Despite being mass-produced, stock cabinets come in a variety of styles, finishes, and sizes. This allows you to find options that suit your taste and complement the overall design of your kitchen.

    Considerations

    The primary drawback of stock cabinets is the limited customization options. While they come in various styles, sizes, and finishes, you might not find the perfect match for your unique preferences. Stock cabinets typically follow standard sizing, which may not fit seamlessly into kitchens with unconventional layouts or specific spatial constraints.

    3. Hybrid Approach: Semi-Custom Cabinets

    A middle-ground option between custom and stock cabinets is the semi-custom approach. This option combines the benefits of both, offering some level of customization while maintaining a more affordable price point compared to fully custom options.

    Semi-Custom Advantages

    Semi-custom cabinets allow you to make certain modifications to standard designs, providing a balance between personalized touches and affordability. Like stock cabinets, semi-custom options come in a variety of styles and finishes, providing a level of variety that suits different design preferences.

    Considerations

    While more affordable than fully custom cabinets, semi-custom options can still be pricier than stock cabinets. Costs can vary based on the extent of customization. Semi-custom cabinets may have a longer lead time compared to stock options, as they still involve some level of customization during the manufacturing process.

    4. Choosing the Right Option for Your Kitchen

    Budget Constraints

    If budget constraints are a top priority, stock cabinets might be the more practical choice. However, if you have more flexibility in your budget and desire a personalized kitchen, custom cabinets might be worth the investment.

    Consider Your Timeline

    If you’re working on a tight schedule, stock or semi-custom cabinets might be the better option due to their quick availability. Custom cabinets typically require a longer lead time.

    Evaluate Your Design Preferences

    If you have specific design preferences and want a kitchen that perfectly aligns with your vision, custom cabinets provide the ultimate customization. If you’re willing to compromise on some aspects, semi-custom or stock options can still offer a pleasing aesthetic.

    Assess Your Kitchen Layout

    The layout of your kitchen can influence the decision. If you have a standard layout and sizing, stock cabinets might work seamlessly. For kitchens with unique layouts, custom or semi-custom options might be necessary.

    Balancing Preferences and Practicality

    Choosing between custom and stock cabinets ultimately depends on a balance between your preferences, budget, and timeline. Custom cabinets offer unparalleled personalization but come with a higher cost and longer lead time. Stock cabinets are more affordable and readily available but offer limited customization. The hybrid approach of semi-custom cabinets provides a middle ground, allowing some personalization while maintaining a more budget-friendly option. Whether you opt for the luxury of custom cabinets, the practicality of stock cabinets, or a blend of both, the goal is to create a kitchen that aligns with your vision and enhances your daily living experience.


    Visit the VIC HOME IMPROVEMENT LLC blog to learn more about your options for cabinet installation.

  • How to Measure and Plan for Countertop Installation

    How to Measure and Plan for Countertop Installation

    Countertops play a pivotal role in the functionality and aesthetics of a kitchen or bathroom. Whether you’re renovating your space or planning a new installation, accurate measurements and meticulous planning are crucial for a successful outcome. In this blog post, we’ll walk you through the essential steps on how to measure and plan for countertop installation, ensuring a seamless and precise process.

    1. Gather Necessary Tools

    Before you begin measuring, gather the tools needed for accurate dimensions. These may include:

    Measuring Tape

    A reliable measuring tape is essential for determining lengths and widths accurately.

    Pencil and Paper

    Keep a notepad and pencil handy to record measurements and notes.

    Digital Angle Finder

    For corners and irregular angles, a digital angle finder can provide precise measurements.

    2. Measure the Length and Width

    Start by measuring the length and width of the countertop area. For straight sections, use the measuring tape along the edges, pulling it taut to avoid any slack. Record these measurements accurately on your notepad.

    3. Account for Overhangs and Edges

    Consider the desired overhang for your countertop. Overhangs not only add aesthetic appeal but also provide space for seating in kitchen areas. Standard overhangs range from 1.5 to 2 inches, but preferences may vary. Measure and record the overhang distance accordingly.

    4. Measure Angles and Corners

    If your countertop has angles or corners, use a digital angle finder to measure these accurately. Place the angle finder against the surface to obtain precise angle measurements. Record these measurements, ensuring you note whether the angles are inside or outside corners.

    5. Assess Wall Conditions

    Examine the conditions of the walls where the countertop will be installed. Check for irregularities, such as bumps, recesses, or unevenness. Note any variations in the wall surface, as these can impact the fit and alignment of the countertop.

    6. Consider Appliances and Fixtures

    If your countertop will accommodate appliances or fixtures, measure their dimensions accurately. Include allowances for clearances and ensure that the countertop will seamlessly integrate with these elements.

    7. Create a Template

    For irregular shapes or non-standard countertops, creating a template is beneficial. Use a large piece of cardboard or plywood to trace the exact shape of the countertop area. This template can serve as a guide for fabricators, ensuring precision in the manufacturing process.

    8. Check Plumbing and Electrical Outlets

    Take note of the location of plumbing and electrical outlets in the countertop area. Measure the distances from the edges of the countertop to these points, ensuring that the countertop will accommodate these fixtures without any interference.

    9. Consult with Professionals

    If your countertop installation involves complex elements or if you’re uncertain about any measurements, consider consulting with professionals. Experienced countertop fabricators or installation experts can provide valuable insights and ensure that measurements align with industry standards.

    10. Plan for Seams

    For larger countertop installations, seams may be necessary. Plan the placement of seams strategically to minimize their visibility. Discuss seam placement with your countertop fabricator to achieve a balance between aesthetics and structural integrity.

    11. Double-Check and Confirm

    Before finalizing your measurements, double-check all dimensions and confirm accuracy. It’s crucial to catch any discrepancies or oversights at this stage to avoid issues during fabrication and installation.

    12. Choose Your Countertop Material

    Once measurements are finalized, select the countertop material that aligns with your preferences, budget, and lifestyle. Whether it’s granite, quartz, marble, or other options, each material has unique characteristics that influence both aesthetics and maintenance requirements.

    13. Communicate Effectively with Installers

    When working with countertop fabricators and installers, effective communication is key. Share your measurements, plans, and any specific requirements clearly to ensure that the installation aligns with your vision.

    14. Prepare the Space

    Before the installation day, prepare the space by removing any existing countertops, appliances, or fixtures that may hinder the process. Clear the area to provide a smooth and accessible workspace for the installers.

    Precision Leads to Perfection

    Measuring and planning for countertop installation requires precision and attention to detail. Accurate measurements, consideration of overhangs, angles, wall conditions, and careful planning for appliances and fixtures are essential steps in the process. Creating templates for irregular shapes, consulting with professionals when needed, and choosing the right countertop material contribute to a successful installation. By following these steps and communicating effectively with installers, you can ensure that your countertop installation meets your expectations and transforms your space with both functionality and style.


    Visit the VIC HOME IMPROVEMENT LLC blog for more information on home improvement projects.

  • Planning Your Home Remodeling Project: Where to Start

    Planning Your Home Remodeling Project: Where to Start

    Embarking on a home remodeling project is an exciting endeavor that can breathe new life into your living space. However, to ensure a smooth and successful renovation, careful planning is essential. In this blog post, we’ll walk you through a step-by-step guide on where to start when planning your home remodeling project, helping you turn your vision into a reality.

    1. Define Your Goals and Priorities

    Before diving into the specifics of your project, take the time to clearly define your goals and priorities. Consider what aspects of your home need improvement, whether it’s updating the kitchen, expanding living spaces, or enhancing curb appeal. Prioritize your needs and desires, creating a list that will serve as a foundation for the rest of the planning process.

    2. Establish a Realistic Budget

    Understanding your financial constraints is crucial in ensuring a successful remodeling project. Establish a realistic budget that aligns with your goals and priorities. Include all potential costs, such as materials, labor, permits, and unforeseen expenses. This budget will serve as a guiding factor throughout the project, helping you make informed decisions and avoid overspending.

    3. Research and Gather Inspiration

    Explore various sources of inspiration to refine your vision for the remodel. Browse design magazines, websites, and social media platforms to gather ideas. Create a mood board or a folder of images that resonate with your aesthetic preferences. This collection will not only help you communicate your vision to contractors but also serve as a point of reference throughout the project.

    4. Assess the Scope of the Project

    Once you have a clear vision and budget in mind, assess the scope of the project. Determine whether the renovation will involve structural changes, electrical and plumbing updates, or cosmetic enhancements. Understanding the extent of the work will help you establish timelines, allocate resources, and identify potential challenges.

    5. Research and Hire Professionals

    Depending on the complexity of your remodeling project, you may need to hire professionals such as architects, designers, contractors, and subcontractors. Research and gather recommendations for reputable professionals in your area. Interview candidates, review their portfolios, and check references to ensure they align with your vision and can deliver the quality of work you desire.

    6. Obtain Necessary Permit

    Many remodeling projects require permits from local authorities to ensure compliance with building codes and regulations. Check with your local municipality to determine the necessary permits for your project. Failing to obtain the required permits can result in delays, fines, or even the halting of the project.

    7. Develop a Detailed Timeline

    Work with your contractor to develop a detailed timeline for the project. Establish milestones and deadlines for each phase, taking into account potential delays and unexpected challenges. A well-planned timeline will help you manage expectations, track progress, and ensure that the project stays on course.

    8. Select Materials and Finishes

    With the guidance of your design inspiration and the input of your professionals, begin selecting materials and finishes for your project. Consider the durability, functionality, and aesthetic appeal of each choice. Create a cohesive design by ensuring that materials and finishes complement each other while staying within your budget.

    9. Plan for Contingencies

    No matter how well you plan, unforeseen issues may arise during the remodeling process. Plan for contingencies by setting aside a portion of your budget for unexpected expenses. This buffer will provide financial flexibility and peace of mind, allowing you to navigate challenges without jeopardizing the overall success of the project.

    10. Communicate Effectively

    Effective communication is key to a successful remodeling project. Maintain open and transparent communication with your contractors, designers, and any other professionals involved. Regularly check in on progress, discuss any concerns or changes, and be proactive in addressing potential issues. A collaborative approach fosters a positive working relationship and ensures that everyone is on the same page.

    heck out the VIC HOME IMPROVEMENT LLC blog to learn more about different types of flooring.

    Turning Dreams into Reality

    Planning a home remodeling project requires a strategic and comprehensive approach. By defining your goals, establishing a realistic budget, researching professionals, obtaining necessary permits, and developing a detailed timeline, you set the foundation for a successful renovation. As you navigate the planning process, keep your vision in focus and stay adaptable to changes. With careful planning and effective communication, you’ll be well on your way to transforming your living space into the home of your dreams.

  • Hardwood vs. Laminate Flooring: Which is Right for You?

    Hardwood vs. Laminate Flooring: Which is Right for You?

    Choosing the right flooring for your home is a significant decision that influences both aesthetics and functionality. Hardwood and laminate flooring are two popular options, each with its unique set of characteristics. In this blog post, we’ll explore the differences between hardwood and laminate flooring, helping you make an informed choice based on your preferences, lifestyle, and budget.

    1. Material and Composition

    Hardwood

    Natural Wood

    Hardwood flooring is crafted from solid wood, providing an authentic and timeless appeal.

    Variety of Species

    Hardwood comes in various wood species, each with its distinct color, grain pattern, and hardness level.

    Laminate

    Composite Materials

    Laminate flooring is composed of multiple layers, typically featuring a high-density fiberboard (HDF) core with a photographic image of wood grain on top.

    Resin-Coated Surface

    The top layer is sealed with a transparent wear layer made of resin, protecting the image and providing durability.

    2. Appearance and Aesthetics

    Hardwood

    Hardwood exudes a natural elegance and warmth, enhancing the overall aesthetic of any room. Over time, hardwood develops a patina, aging gracefully and adding character to the flooring.

    Laminate

    Laminate is resistant to scratches and impacts, making it a practical choice for high-traffic areas. Easy to maintain, requiring regular sweeping and occasional damp mopping. It is more resistant to moisture than hardwood.

    4. Comfort and Insulation

    Hardwood

    LHardwood provides natural insulation, offering a warmer surface underfoot. The solid wood construction contributes to a comfortable and pleasant walking experience.

    Laminate

    Laminate is warmer underfoot compared to tile or stone flooring options. While it doesn’t provide the same level of insulation as hardwood, laminate offers a comfortable walking surface.

    5. Cost Considerations

    Hardwood

    Hardwood flooring generally comes with a higher upfront cost, especially for premium wood species. Considered a long-term investment, as the durability and timeless appeal can add value to your home.

    Laminate

    Laminate is a more cost-effective option, making it suitable for budget-conscious homeowners. Installation costs are often lower, and the flooring itself is priced more competitively.

    6. Environmental Impact

    Hardwood

    Choose hardwood from sustainable sources, such as FSC-certified wood, to minimize environmental impact. Hardwood is a natural resource, and responsible sourcing practices are essential for conservation.

    Laminate

    Laminate is made from composite materials, including fiberboard, which may have a higher environmental impact. Some laminate products are recyclable, but environmental considerations may vary depending on the manufacturing process.

    Finding Your Perfect Flooring Match

    Choosing between hardwood and laminate flooring involves considering various factors, including your aesthetic preferences, lifestyle, maintenance requirements, and budget constraints. Hardwood offers a timeless and natural elegance, while laminate provides versatility, durability, and cost-effectiveness. Whether you prioritize the warmth of real wood or the practicality of laminate, both flooring options have their unique appeal. By weighing the pros and cons of hardwood and laminate flooring, you can make an informed decision that aligns with your personal style and meets the needs of your home.


    Check out the VIC HOME IMPROVEMENT LLC blog to learn more about different types of flooring.

  • Kitchen Remodeling on a Tight Budget: Smart Money-Saving Strategies

    Kitchen Remodeling on a Tight Budget: Smart Money-Saving Strategies

    Kitchen Remodeling on a Tight Budget: Smart Money-Saving Strategies

    A closeup of a person painting a cabinet with a paintbrush.

    Embarking on a kitchen remodeling project doesn’t have to break the bank. With strategic planning and clever choices, you can revitalize your kitchen on a tight budget. In this blog, we’ll explore smart money-saving strategies that allow you to achieve a stylish and functional kitchen without compromising your financial well-being.

    1. Set a Realistic Budget: The Foundation of Smart Planning

    Before diving into the remodeling process, assess your overall financial situation. Determine how much you can comfortably allocate to the project without straining your budget. Identify the essential changes you want to make in your kitchen. Prioritize these needs to ensure that your budget is allocated to the most impactful improvements.

    Research and Get Quotes

    Reach out to contractors, suppliers, and service providers to gather multiple quotes for the materials and services you require. Understanding the average costs for different aspects of kitchen remodeling helps you set a realistic budget and identify areas where you can potentially save.

    2. DIY Where Possible: Tapping into Your Inner Handyman

    Consider simple upgrades that you can complete yourself. Instead of replacing cabinets, consider giving them a fresh coat of paint. This simple upgrade can significantly transform the look of your kitchen. Tiling a backsplash is a manageable DIY project that can enhance the aesthetics of your kitchen without a hefty price tag.

    Personalized Touch

    Removing cabinet doors and opting for open shelving can create a modern and airy look. This is a relatively simple DIY project that adds a personalized touch to your kitchen. Swapping out cabinet handles and faucets is a cost-effective way to bring a fresh and updated vibe to your kitchen.

    3. Reface Instead of Replace: Budget-Friendly Cabinet Makeover

    Instead of investing in entirely new cabinets, consider refacing the existing ones. Cabinet refacing involves replacing doors and drawer fronts while retaining the cabinet frames. This approach can provide a new aesthetic for your kitchen at a fraction of the cost of full cabinet replacement.

    • Laminate and Veneer Options: When selecting materials for cabinet refacing, opt for budget-friendly choices like laminate or veneer. These materials can mimic the look of more expensive options without the hefty price tag.
    • Painting and Staining: If your cabinets are in good condition, consider painting or staining them for a budget-friendly makeover.

    4. Explore Affordable Countertop Options: Finding the Balance

    Laminate countertops are a wallet-friendly alternative to pricier materials like granite or quartz. Modern laminate options come in a variety of designs that can mimic the appearance of natural stone or wood, providing versatility without the high cost.

    Butcher block countertops offer a warm and natural aesthetic. They are often more affordable than stone alternatives. For those with some DIY skills, installing butcher block counters can be a feasible and cost-effective project.

    5. Optimize Lighting: Bright Ideas for Savings

    Maximize natural light by strategically placing mirrors or choosing light-colored window treatments to make the kitchen feel more spacious. Instead of costly overhead fixtures, consider installing under-cabinet lighting. It adds task lighting and highlights key areas in the kitchen.

    Energy-Efficient Fixtures

    • LED Bulbs: Invest in energy-efficient LED bulbs. While they may have a higher upfront cost, they last longer and consume less electricity, saving you money in the long run.
    • Smart Lighting Controls: Implementing smart lighting controls allows you to adjust brightness and save energy according to your needs.

    6. Shop Smart: Finding Deals and Discounts

    Consider purchasing floor models or display units for appliances. These are often available at a significant discount and are in excellent condition. Explore appliance bundles or packages offered by retailers. Buying multiple appliances together can often result in cost savings.

    Utilize Sales and Promotions

    Take advantage of sales events and promotions. Many retailers offer discounts during holidays, end-of-season clearances, or special promotional periods. Compare prices across multiple stores and online platforms to ensure you get the best deal on the materials and appliances you need.

    7. Maintain the Existing Layout: Cost-Effective and Efficient

    Keeping the existing kitchen layout can save a significant amount of money. Structural changes, such as moving plumbing or electrical systems, can quickly escalate costs, not to mention the inconvenience. Instead of changing the layout, concentrate on cosmetic updates that can enhance the overall look and feel of the space.

    a woman sits at a desk and makes calculations while taking notes, creating a budget.

    A Budget-Friendly Kitchen Transformation

    Remodeling your kitchen on a tight budget is not only possible but can also result in a stylish and rejuvenated space. By setting a realistic budget, incorporating DIY projects, exploring cost-effective materials, shopping strategically, and maintaining the existing layout, you can achieve a remarkable transformation without draining your finances. Remember, a successful kitchen remodel is not solely about the amount spent but about making smart choices that enhance both the aesthetics and functionality of your kitchen. Embrace these budget-friendly strategies, and watch as your kitchen undergoes a cost-effective and impressive makeover.

    Visit the WQ Construction blog for more advice on planning your home renovation projects.

  • Maintenance Tips for Keeping Your Countertops Looking Like New

    Maintenance Tips for Keeping Your Countertops Looking Like New

    Maintenance Tips for Keeping Your Countertops Looking Like New

    A smiling woman wearing gloves sprays cleaner on a countertop and wipes with a sponge.

    Countertops are not just functional surfaces in our homes; they’re focal points that contribute to the overall aesthetic. Whether you have granite, quartz, marble, or another material, maintaining your countertops is key to preserving their beauty and longevity. In this blog, we’ll explore effective countertop maintenance tips to keep them looking like new, ensuring they remain a stunning centerpiece in your kitchen or bathroom.

    Know Your Countertop Material

    Different countertop materials have distinct characteristics and require specific care. For instance, granite is known for its durability but may require periodic resealing, while marble is elegant but more susceptible to stains. Understand the unique properties of your countertop material to tailor your maintenance routine accordingly.

    Check Manufacturer Guidelines

    Refer to the manufacturer’s guidelines for your specific countertop material. These guidelines often provide valuable information on recommended cleaning products, sealing schedules, and maintenance practices. Adhering to these guidelines ensures that you’re caring for your countertops in a way that aligns with the manufacturer’s recommendations.

    Daily Cleaning Routine

    Incorporate a daily cleaning routine to prevent the buildup of dirt, grime, and spills. Use a mild, pH-balanced cleaner specifically designed for your countertop material. Avoid harsh chemicals, abrasive cleaners, or acidic substances that can damage the surface over time.

    Soft Microfiber Cloths

    Opt for soft microfiber cloths or non-abrasive sponges for daily cleaning. These materials are gentle on the surface and won’t scratch or dull the finish. Avoid using scouring pads or abrasive brushes, especially on surfaces prone to scratching, like quartz or marble.

    Wipe Up Spills Promptly

    Promptly wipe up spills to prevent stains and damage. Different materials have varying degrees of porosity, so it’s essential to address spills quickly. This practice not only maintains the aesthetics but also ensures the longevity of your countertops.

    Sealing and Resealing

    Regular Sealing Schedule

    Many natural stone countertops, such as granite and marble, benefit from periodic sealing to protect against stains and moisture absorption. Establish a regular sealing schedule based on your countertop material and usage. The frequency can range from annually to every few years, depending on the material.

    Test the Seal

    Conduct a simple water droplet test to assess whether your countertop needs resealing. Place a few drops of water on the surface and observe. If the water beads up, the seal is intact. If it absorbs into the countertop, it’s time to reapply the sealant. Always follow the manufacturer’s recommendations for the appropriate sealant for your countertop material.

    Preventing Heat and Impact Damage

    Use Trivets and Hot Pads

    Protect your countertops from heat damage by using trivets or hot pads under hot pots, pans, or kitchen appliances. While many countertop materials are heat-resistant, prolonged exposure to high temperatures can cause discoloration or damage.

    Avoid Direct Impact

    Prevent chips, cracks, or scratches by avoiding direct impact with heavy objects. Use cutting boards for chopping and slicing to protect softer materials like marble or quartz. While granite is more resistant to impact, it’s still wise to exercise caution to maintain its polished appearance.

    Dealing with Stains

    Prompt Stain Removal

    Tackle stains promptly to minimize their impact. Different stains require specific cleaning approaches. For instance, a mixture of baking soda and water can be effective for lifting certain stains, while a poultice (a paste-like mixture) might be needed for oil-based stains. Consult your countertop material guidelines for stain removal recommendations.

    Avoid Harsh Cleaners

    Steer clear of harsh or acidic cleaners when dealing with stains, as they can exacerbate the issue or cause damage. Instead, opt for gentle, stain-specific solutions recommended for your countertop material. Always test a small, inconspicuous area first to ensure compatibility.

    Regular Professional Inspections

    Scheduled Professional Assessments

    Consider scheduling regular professional assessments of your countertops. A professional can identify potential issues, recommend maintenance practices specific to your countertops, and address any concerns before they escalate. Professional inspections can extend the life and beauty of your countertops.

    Professional Restoration Services

    If your countertops show signs of wear, consider professional restoration services. These services can polish, repair, and rejuvenate your countertops, restoring them to their original glory. Professional touch-ups can be particularly beneficial for high-traffic areas or countertops that have endured years of use.

    Maintaining Gorgeous Countertops

    Your countertops are a significant investment and contribute significantly to the aesthetics of your home. By incorporating these maintenance tips into your routine, you can ensure that your countertops remain a stunning focal point, reflecting both style and practicality. From daily cleaning habits to periodic sealing and addressing stains promptly, these practices will help you enjoy your countertops in their pristine condition for years to come. Elevate the elegance of your kitchen or bathroom with countertops that always look like new.

    Visit the VIC Home Improvements LLC blog for more tips on maintaining your home so you can enjoy it for years to come!

  • Choosing the Right Finish: A Comprehensive Guide to Wood Finishes

    Choosing the Right Finish: A Comprehensive Guide to Wood Finishes

    Choosing the Right Finish: A Comprehensive Guide to Wood Finishes

    A worker’s hand as he polishes a piece of dark stained wood.

    Selecting the appropriate finish for your wood project is a pivotal decision that not only enhances the natural beauty of the wood but also safeguards it against wear, moisture, and environmental elements. With a plethora of options available, choosing the right wood finish can be a daunting task. In this comprehensive guide, we will explore different types of wood finishes, their characteristics, and the factors to consider when making the best choice for your project.

    Types of Wood Finishes

    Varnish

    Varnish is durable and long-lasting, and provides a glossy or satin finish. It offers excellent protection against scratches and moisture. It is ideal for use in furniture, tabletops, and high-traffic surfaces.

    Polyurethane

    Polyurethane is available in oil-based and water-based forms. It is durable and resistant to water, chemicals, and scratches. This finish provides a clear, glossy, or satin finish, perfect for floors, furniture, and woodwork.

    Shellac

    Shellac is derived from natural resins. It is fast-drying with a warm amber hue, and offers moderate protection against moisture and scratches. It is commonly used in antique restoration, wooden ornaments, and interior woodwork.

    Lacquer

    Lacquer is fast-drying and durable, and is available in clear or tinted versions. It provides a high-gloss finish. It is often used on furniture, musical instruments, and decorative pieces.

    Oil Finishes

    Oil finishes penetrate the wood to enhance its natural appearance. They are available in linseed, tung, or Danish oil, and require periodic reapplication. It’s best when applied to wooden countertops, cutting boards, and interior wood surfaces.

    Stain

    Stain adds color to wood while allowing the grain to show through. It is available in oil-based, water-based, and gel forms. It enhances the appearance of lower-grade woods. It is recommended for furniture, cabinetry, and projects where color customization is desired.

    Factors to Consider When Choosing a Wood Finish

    Type of Wood:

    Different wood species absorb finishes differently. Consider the wood’s natural color, grain pattern, and hardness when choosing a finish.

    Intended Use:

    The purpose of the wood project influences the choice of finish. High-traffic areas may require more durable finishes, while decorative pieces might benefit from a finish that enhances the wood’s aesthetics.

    Desired Finish Appearance:

    Determine whether you prefer a glossy, satin, or matte finish. Some finishes, like polyurethane, offer various sheen levels, allowing you to customize the appearance to your liking.

    Durability and Protection:

    Consider the level of protection needed based on the wood’s exposure to wear, moisture, and sunlight. For high-traffic areas or outdoor projects, opt for finishes with enhanced durability.

    Ease of Application:

    Some finishes are easier to apply than others. Water-based finishes typically have a faster drying time and emit fewer fumes than oil-based counterparts. Consider your skill level and the complexity of the project when choosing a finish.

    Maintenance Requirements:

    Different finishes have varying maintenance needs. Some require periodic reapplication, while others offer long-lasting protection. Consider the level of maintenance you are willing to commit to over time.

    Environmental Impact:

    Water-based finishes are generally considered more environmentally friendly due to lower VOC (volatile organic compound) levels. If eco-friendliness is a priority, opt for finishes with minimal environmental impact.

    Tips for a Successful Wood Finishing Project

    First, ensure the wood surface is clean, dry, and free of contaminants. Sand the wood to a smooth finish before applying the chosen finish.

    Test on Scrap Wood

    Before applying the finish to your project, test it on a scrap piece of the same wood to ensure compatibility and to see how the finish will affect the color and appearance.

    Follow Manufacturer Instructions

    Read and follow the manufacturer’s instructions for the chosen finish. Pay attention to recommended drying times, application techniques, and any safety precautions.

    Apply Thin Coats

    Rather than applying a thick coat, apply multiple thin coats for better absorption and a more even finish. Sand between coats for a smoother result.

    Protect Yourself

    Use proper personal protective equipment, such as gloves, a mask, and proper ventilation, especially when working with finishes that emit fumes or have potential health hazards.

    Selecting the Perfect Finish

    Choosing the right wood finish involves a thoughtful consideration of the type of wood, intended use, desired appearance, and application techniques. Whether you’re aiming for a glossy polyurethane finish on your hardwood floors or a natural oil finish on a handmade piece of furniture, understanding the characteristics and benefits of each type of finish is key to a successful project. 

    Visit the VIC HOME IMPROVEMENT LLC blog for more information on how to approach your next wood finishing project!

  • Pros and Cons of Granite vs. Quartz

    Pros and Cons of Granite vs. Quartz

    Pros and Cons of Granite vs. Quartz

    A closeup of a white quartz countertop flecked with black and gray.

    Home renovations involve many decisions, and one of the pivotal choices is selecting the ideal countertop material. Granite and quartz are two popular options, each with its unique characteristics. In this blog post, we’ll explore the pros and cons of granite and quartz, providing valuable insights to help homeowners make informed decisions for their renovation projects.

    1. Classic Hardwood Patterns With a Twist

    Classic hardwood floor patterns like herringbone and chevron have made a triumphant return to the spotlight. These intricate layouts add a touch of sophistication and visual interest to a room. Herringbone and chevron patterns showcase a timeless appeal, and when paired with the warmth of hardwood, they create a flooring choice that harmonizes tradition with a modern twist.

    Granite Countertops

    Pros

    Timeless Aesthetics

    Granite boasts natural beauty and unique patterns, making each slab one-of-a-kind. The timeless appeal of granite can enhance the visual aesthetics of any kitchen or bathroom.

    Durability

    Known for its durability, granite is resistant to scratches and heat. This durability makes it an ideal choice for high-traffic areas, ensuring longevity and resilience against daily wear and tear.

    Increased Home Value

    Granite countertops are often associated with luxury and quality. Choosing granite can contribute to the perceived value of a home, potentially increasing its overall market appeal.

    Repairable

    In the event of minor damage, granite can often be repaired by professionals. This repairability can be a cost-effective solution for homeowners who want to maintain the original appearance of their countertops.

    Cons

    Porosity

    Granite is a porous material, meaning it can absorb liquids. Without proper sealing, this can lead to staining over time. Regular sealing is necessary to maintain its resistance to stains.

    Maintenance Requirements

    Granite countertops require ongoing maintenance, including regular sealing. Homeowners must be aware of and commit to proper care to prevent issues like staining and bacterial growth.

    Weight

    Granite is a heavy material, and installation may require additional structural support. This can increase the complexity and cost of the installation process.

    Quartz Countertops

    Pros

    Consistent Appearance

    Quartz countertops are engineered to provide a consistent appearance across slabs. This uniformity is advantageous for homeowners seeking a cohesive and predictable aesthetic.

    Non-Porous Surface

    Quartz is non-porous, making it highly resistant to stains and bacterial growth. This characteristic reduces the need for rigorous maintenance and ensures a hygienic surface in kitchens and bathrooms.

    Variety of Colors and Patterns

    Quartz countertops offer a vast array of colors and patterns. Homeowners have the flexibility to choose a style that complements their overall design theme, providing versatility for various renovation projects.

    Durability

    Quartz is a durable material, resistant to scratches and impacts. This durability makes it suitable for busy kitchens and bathrooms, offering a low-maintenance, long-lasting solution.

    Cons

    Limited Heat Resistance

    While quartz is generally resistant to heat, it may not withstand high temperatures as well as granite. Placing hot pots directly on the surface can lead to damage, and homeowners should be cautious about potential heat-related issues.

    Artificial Appearance

    Some homeowners prefer the natural look of stone, and quartz, being an engineered material, may not provide the unique variations found in natural stones like granite.

    Cost

    Quartz countertops are often more expensive than granite. Homeowners must consider their budget constraints and weigh the cost difference between the two materials.

    Considerations for Homeowners

    Budget Constraints

    Evaluate your budget and consider the cost implications of both granite and quartz. While granite may offer a more natural look, quartz provides a uniform appearance with potentially lower maintenance costs.

    Aesthetic Preferences

    Consider your aesthetic preferences. If you appreciate the uniqueness of natural stone, granite might be the right choice. If you prefer a consistent appearance and a wide variety of design options, quartz may better suit your tastes.

    Practicality and Maintenance

    Assess your lifestyle and willingness to commit to maintenance. If you prefer a countertop with lower maintenance requirements, quartz’s non-porous surface may be more suitable for your needs.

    Project Scope

    Evaluate the scope of your renovation project. If weight considerations are a factor, especially for upper-floor installations, quartz’s lighter weight may be advantageous.

    A reflective granite kitchen countertop in a luxurious kitchen.

    Choosing the Right Material for Your Home

    Deciding between granite and quartz for your home renovations involves careful consideration of various factors. Both materials offer distinct advantages and come with certain drawbacks. Granite’s natural beauty and timeless appeal may resonate with those seeking a more traditional look, while quartz’s consistent appearance and durability make it an attractive choice for modern homes.

    As a homeowner, align your decision with your aesthetic preferences, budget constraints, and practical considerations. Engaging in open communication with your contractor and exploring samples of both materials can provide a tactile sense of what each option entails. Ultimately, whether you opt for the natural allure of granite or the engineered precision of quartz, your decision should reflect your needs and personal preferences. 

    Visit the VIC Home Improvement LLC blog for more information on potential renovations!

  • Hardwood Floor Trends: Timeless Styles and Modern Innovations

    Hardwood Floor Trends: Timeless Styles and Modern Innovations

    Hardwood Floor Trends: Timeless Styles and Modern Innovations

    A view of an empty modern room paneled with alternating light and dark wood.

    Hardwood floors are not just a classic flooring choice; they are a timeless element that effortlessly combines elegance, warmth, and durability. As interior design trends evolve, so do the styles and innovations within the realm of hardwood flooring. In this blog post, we’ll take a closer look at the current trends that seamlessly blend timeless charm with contemporary flair, providing homeowners with a diverse range of options to elevate their living spaces.

    1. Classic Hardwood Patterns With a Twist

    Classic hardwood floor patterns like herringbone and chevron have made a triumphant return to the spotlight. These intricate layouts add a touch of sophistication and visual interest to a room. Herringbone and chevron patterns showcase a timeless appeal, and when paired with the warmth of hardwood, they create a flooring choice that harmonizes tradition with a modern twist.

    Mixed Species and Widths

    Embrace the beauty of natural variation by mixing hardwood species and widths within the same space. This trend allows for creativity and personalization, introducing a dynamic visual element that adds character and uniqueness to your floors. Whether combining light and dark woods or different widths for a more eclectic look, the mixed-species trend is a nod to the diverse beauty found in nature.

    2. Dark and Rich Finishes

    Dark and rich finishes, such as espresso and charcoal, have gained significant popularity for their ability to make a bold statement. These deep, luxurious hues create a sense of drama and sophistication, transforming your floors into a focal point of the room. Dark hardwood floors serve as a striking backdrop for light-colored furniture and décor, achieving a visually striking contrast.

    Matte and Satin Finishes

    In addition to dark stains, matte and satin finishes are trending for their ability to conceal scratches and provide a more subdued, modern aesthetic. Unlike glossy finishes, which reflect more light, matte and satin finishes showcase the natural beauty of the wood while offering a contemporary and sophisticated look. This trend emphasizes the tactile qualities of hardwood, inviting a more intimate connection with the flooring.

    3. Wide Planks for a Modern Look

    Wide plank hardwood flooring continues to be a popular choice for those seeking a modern and spacious feel. The wider planks not only create the illusion of larger rooms but also showcase the natural beauty and character of the wood. This trend is particularly effective in open-concept spaces, adding a touch of luxury to the entire area. The result is a floor that exudes both grandeur and warmth.

    Mixed Materials and Textures

    Experiment with mixed materials and textures by combining wide plank hardwood with other flooring materials like stone or tile. This trend introduces a creative dynamic, allowing for defined zones within a space. The juxtaposition of warm hardwood against cooler materials adds depth and visual interest, creating a harmonious balance between classic and contemporary elements.

    4. Sustainability and Eco-Friendly Options

    Sustainability is increasingly becoming a focal point in design choices, and reclaimed and salvaged wood flooring is a testament to this trend. By reusing wood from old buildings or structures, this option not only reduces environmental impact but also adds a unique character to your floors. The patina and history embedded in reclaimed wood align with the growing desire for eco-friendly and socially responsible home design.

    Engineered Hardwood with Sustainable Core:

    Engineered hardwood with a sustainable core is a modern innovation that combines the appeal of hardwood with eco-friendly materials. The top layer is made from real hardwood, while the core is constructed from layers of sustainable materials. This option provides stability, durability, and a reduced environmental footprint compared to traditional solid hardwood. Homeowners can enjoy the beauty of hardwood while making an environmentally conscious choice.

    5. Light and Natural Finishes

    Light and natural finishes, including blonde and whitewashed tones, are making a comeback, offering a fresh and airy feel to interiors. These finishes enhance the natural grain of the wood while brightening up spaces. Lighter hardwood floors are an excellent choice for small rooms or areas with limited natural light, creating an illusion of expansiveness and promoting a serene atmosphere.

    Wire-Brushed and Hand-Scraped Textures

    Textured finishes, such as wire-brushed and hand-scraped, are gaining popularity for their ability to add depth and character to light-colored hardwood floors. These textures showcase the natural imperfections and grain patterns of the wood, creating a lived-in and rustic aesthetic. The combination of light finishes and textured surfaces offers a perfect balance between modern simplicity and timeless charm.

    A closeup of a herringbone patterned wood floor.

    Renovate Your Home With Trendy Flooring Options

    Hardwood floor trends continue to evolve, offering a perfect blend of timeless styles and modern innovations. Whatever your preferences, there’s a hardwood flooring trend to suit every taste and lifestyle.

    As you consider updating or installing hardwood floors in your home, exploring these trends will help you find the perfect balance between traditional charm and contemporary aesthetics. Visit the VIC Home Improvement LLC blog for more tips on home renovation trends!